
Attaching cedar panels to our Ram Promaster 2500 ceiling and walls for that ‘homey’ feel
This post contains affiliate links to amazon. These are links to products we own or recommend for this project. If you purchase anything from a link, we will receive a small commission.
There’s nothing like seeing your van come together. The point Edith started feeling more like a home for us was when the cedar tongue and groove planks were installed. Covering up the ugly insulation did wonders.
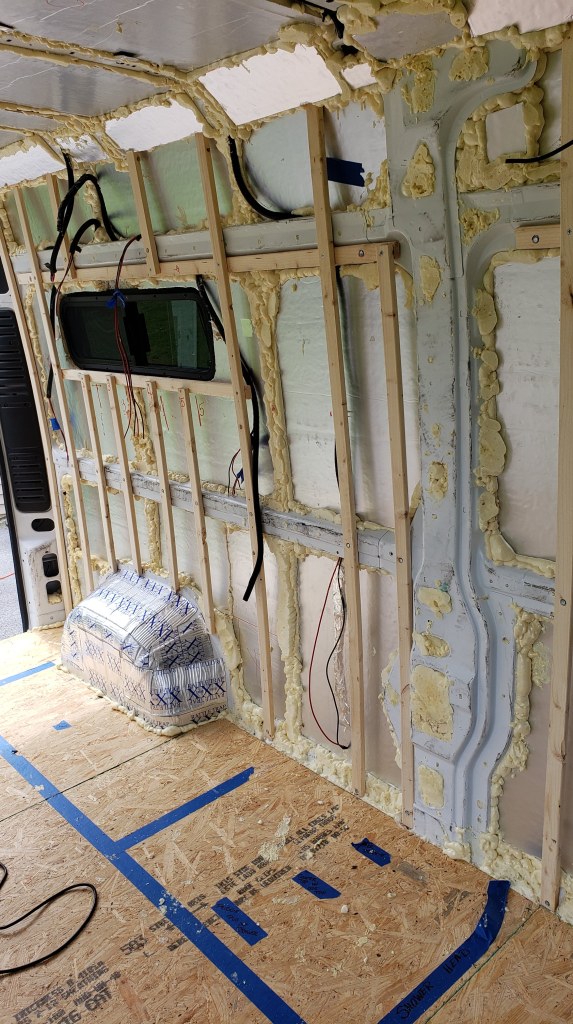
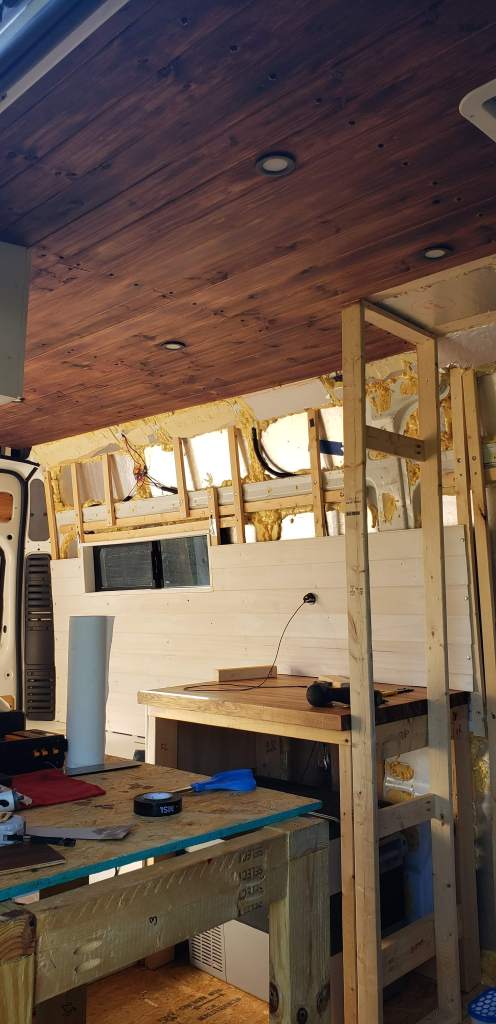
Before starting just about any project in the van (including building the bed area), it’s necessary to create the wall studs within the van. Fastening some wood studs to the body of the van with some heavy duty screws will provide a lot of confidence moving forward. Confidence the walls will stay where they are put. Confidence any cabinet and furniture will remain in place while suffering from the daily ‘earth quakes’ of travel.
Materials
- 1″ x 2″ x 8′ pine lumber
- Self-tapping screws
- 3/4″ truss head screws (we liked the exposed hardware for our van)
- Paint color of choice
- (Optional) Stain of choice
- 1″ x 3″ x 8′ trim pine lumber
- 1/4″ x 3.5″ x 8′ Cedar tongue and groove planks
Tools
- Measuring tape
- Spade bit
- Miter saw
- Jigsaw
- Drill
- Drill bits
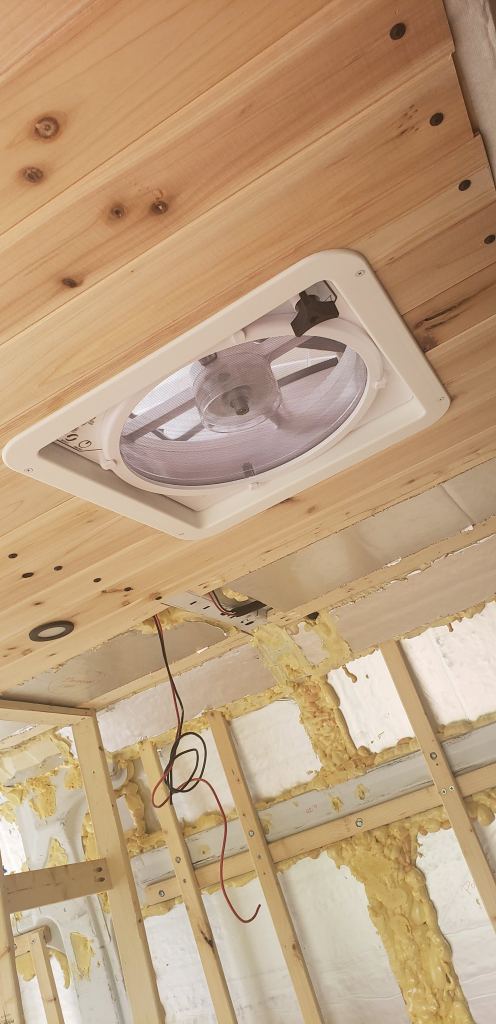
- Hole saw for puck lights in the ceiling and usb chargers on the wall
- Impact driver
- (Optional, but recommended) Table saw
Process
Because the van body does not provide a flush surface, it’s imperative to create some furring strips. The strips we picked felt a tiny bit narrow, so I’d recommend using 1″ x 3″ pine lumber (instead of 1″ x 2″ listed in the materials) OR ripping 3″ strips from some 3/4″ plywood with a table saw.
Measure and cut the boards to length. The vertical pieces in ours were mostly over 5 feet in length, so make sure to buy appropriately sized lumber.


Attach the furring strips only to the ribs of the van. Do not poke a hole through the ‘skin’ of your van. Once everything is cut to size, hold it in place, mark where the screws should go, then drill a pilot hole through the furring strip and into the metal in every place along the board.
Next, pick the spade bit that will bore a hole large enough to hide the screw heads flush and start carving out where the pilot holes are. Based on the screws I recommended, I used a 1/2-inch spade bit. Take a screw, hold it up to the spade bit and mark the spade bit with some painters tape at the depth needed to hide the screw head. This prevents digging out too deep in the furring strip, but still allows the head of the screw to be flush with the surface of the wood. The same process was used in the floor framing process.

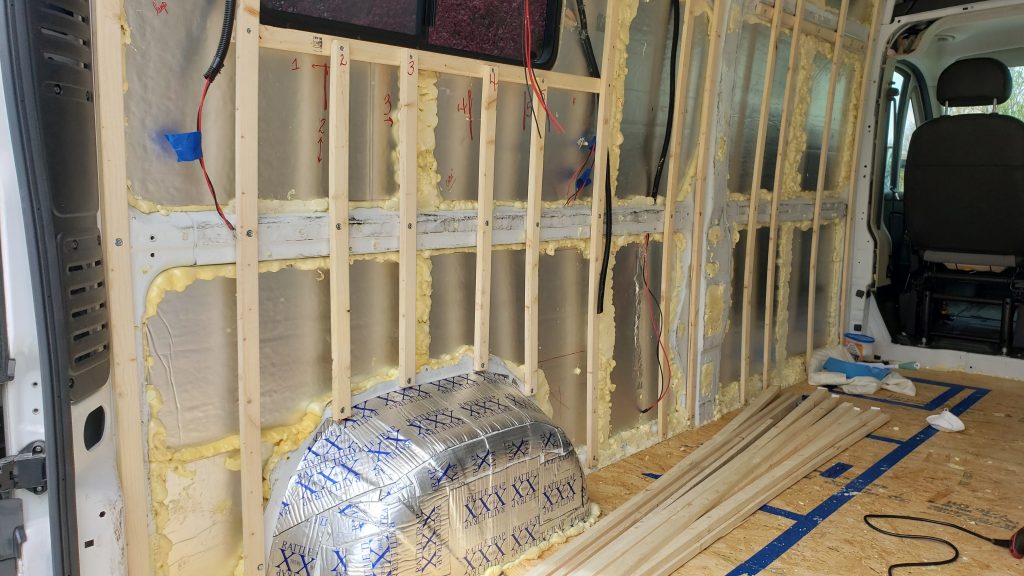
After all of the furring strips are installed, some cabinets and other furniture can be installed and secured directly to the newly created studs.
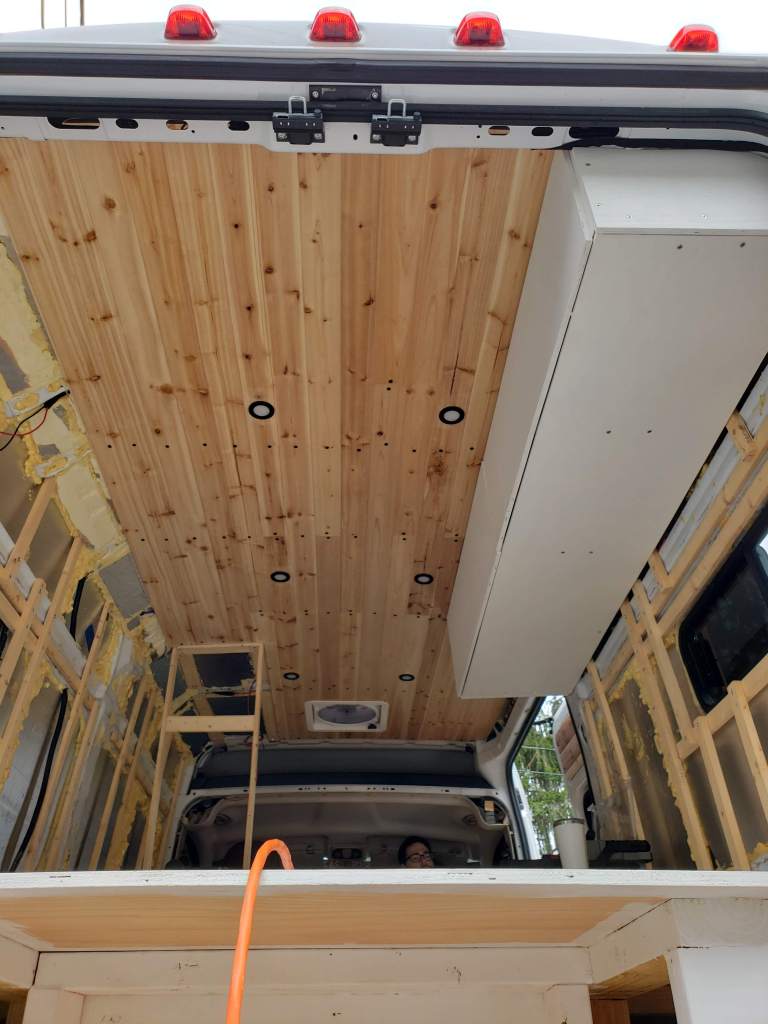
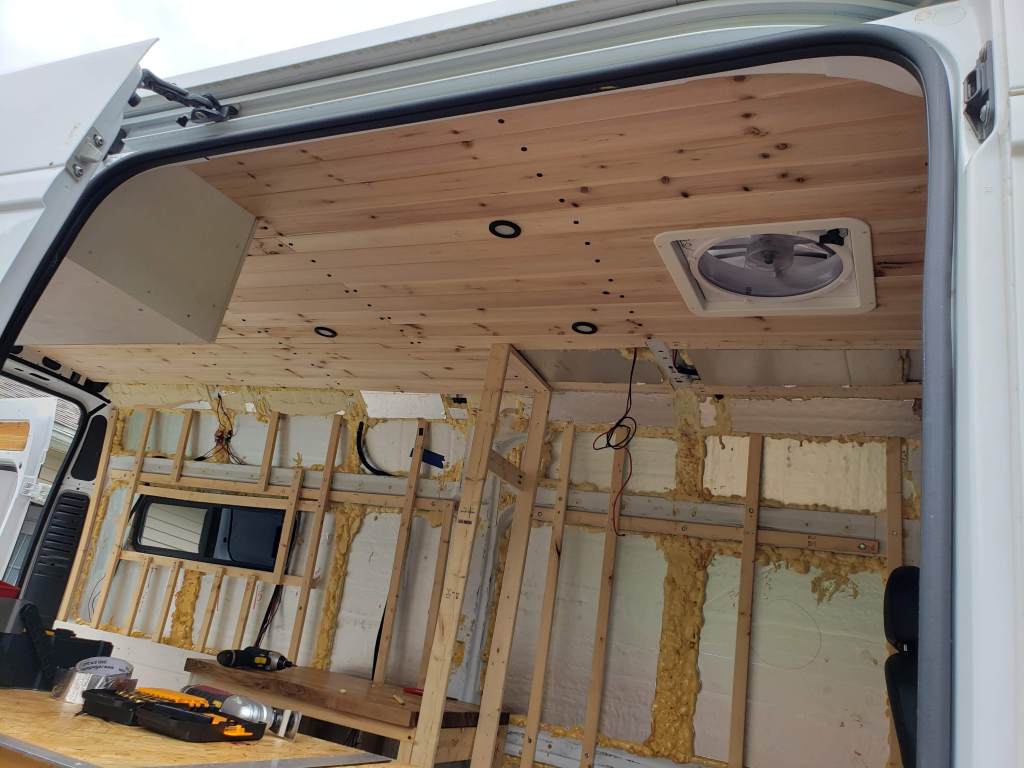
To save some money we waited until the bed, cabinets, and wet room was built out. Then we installed cedar tongue and groove panels only on the areas that were exposed.


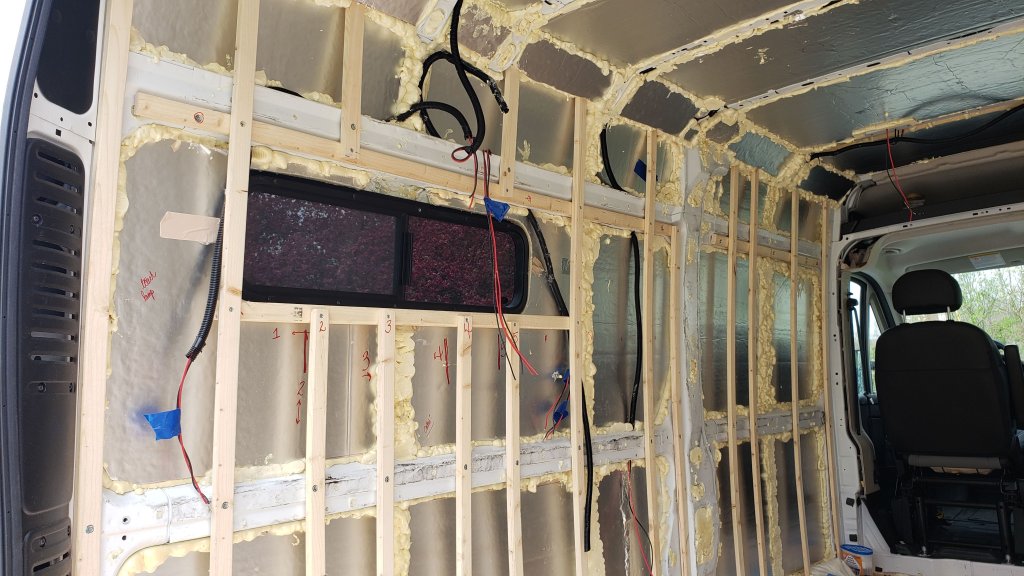
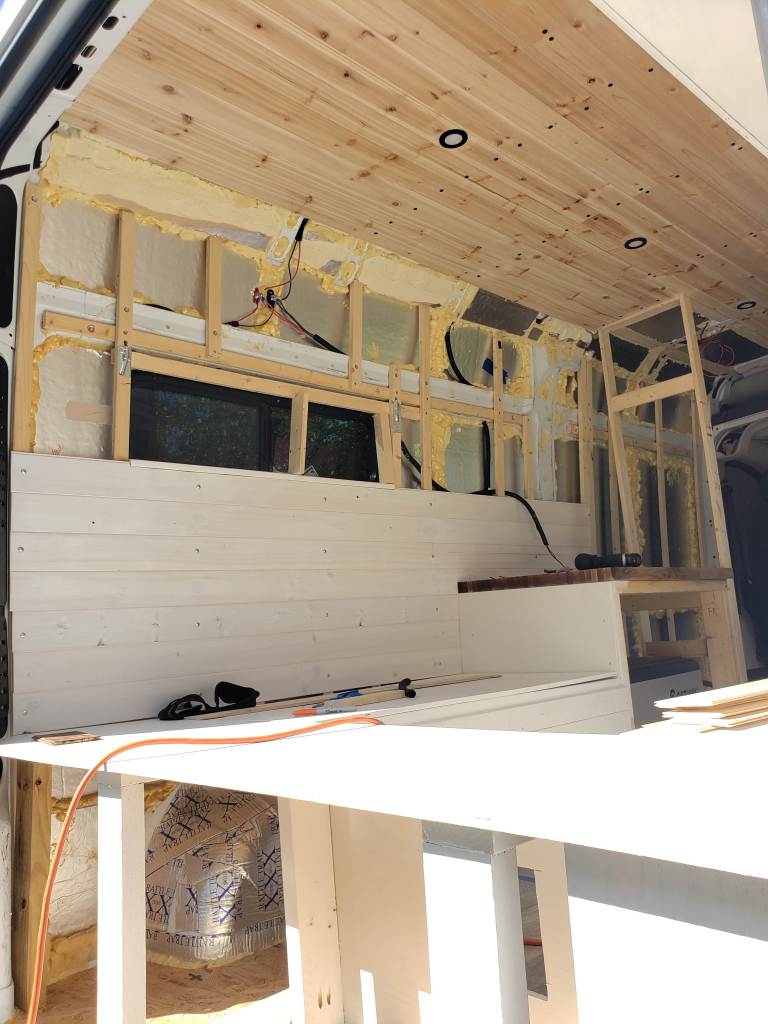
We cut the planks to varying length so the ends would stop on a rib and we would be able to start a new plank and not have every seam line up at the same spot. Then we attached them to the ribs with some black truss head screws. Plan where the lights are going, then make the cuts with a hole saw before installing them. I’ll go into more detail about the lights in a separate post about the electrical components.


One other recommendation I would make would be to decide on a finish before installing the planks. Staining something over your head takes a lot of time and will wear you down. Speaking of stain, we found a fun and cheap method for making a stain. Once we made the stain, we applied it with a rag in a thin layer and waited for the magic to happen. At first it really looks like it dries the wood out, but then it magically comes to life with some oil/wax combination.
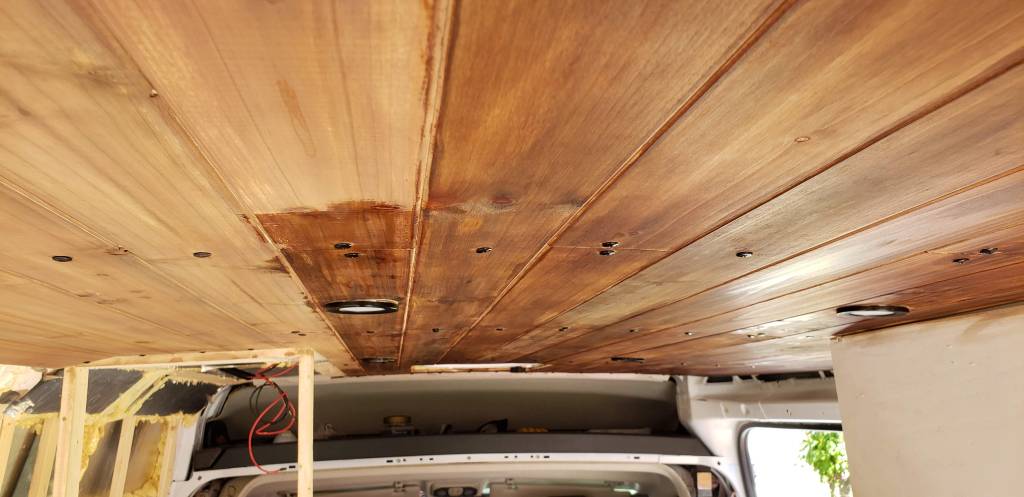
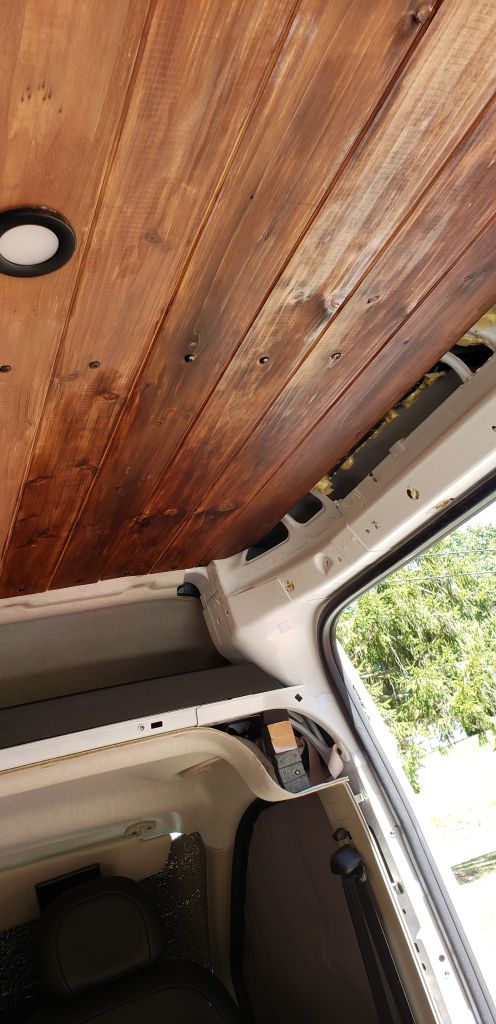
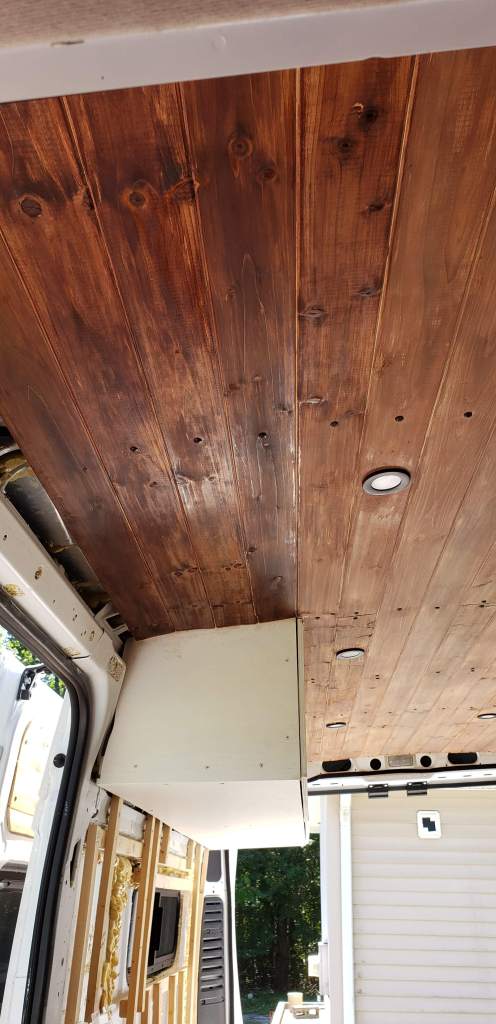


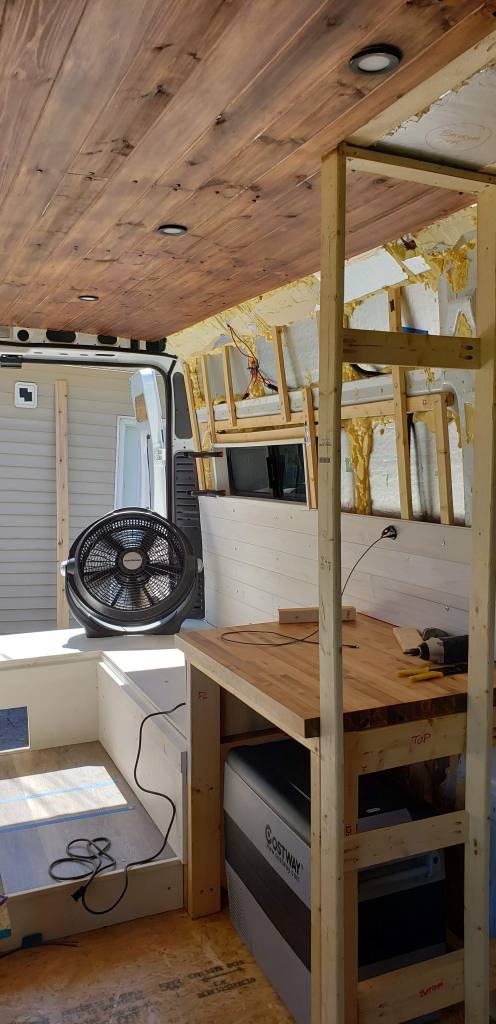
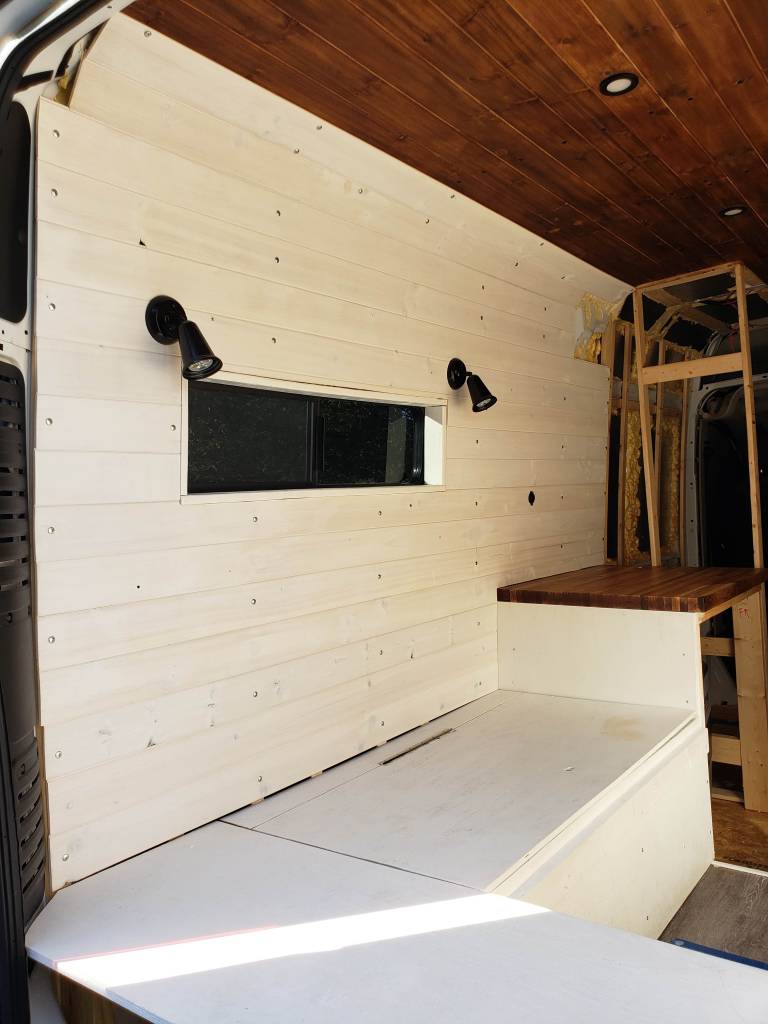
We think the cedar looked nice natural, but we wanted some sort of contrast between the walls and the ceiling so we went fairly dark. The cedar aged very nicely with the stain and became a deep red brown color. We applied some mineral oil for shine, but we plan on applying some wax to help it age well.
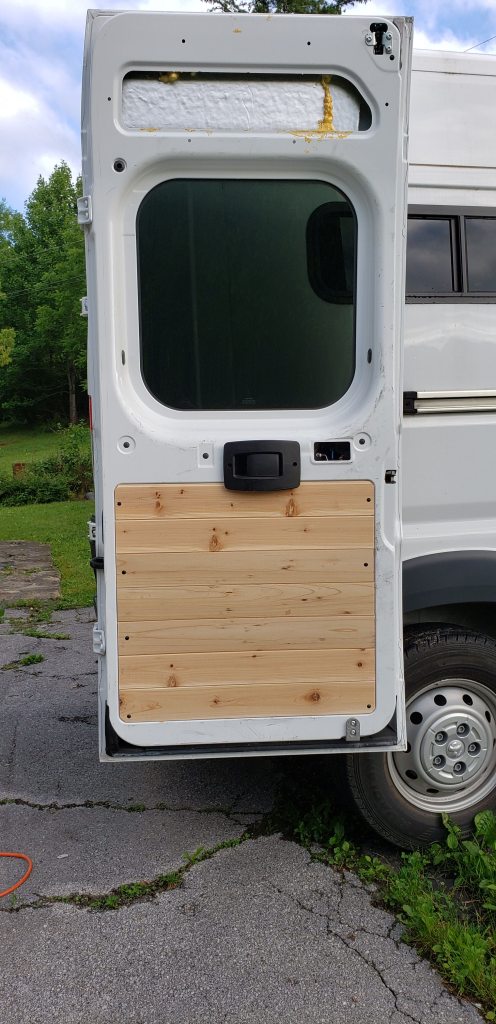
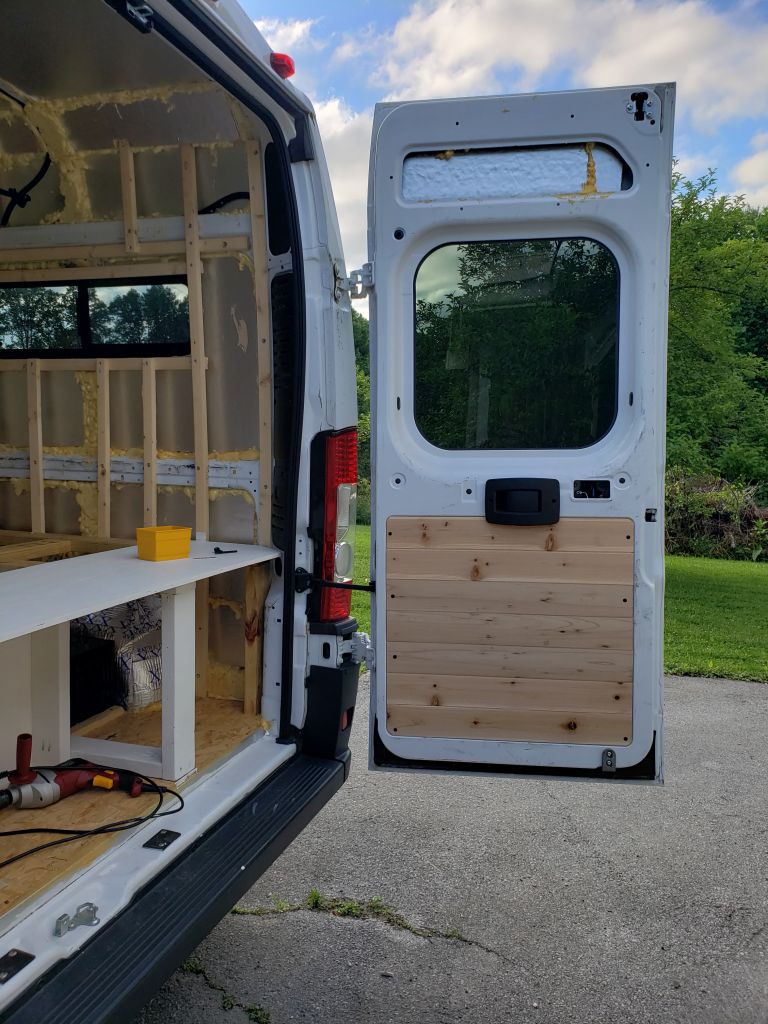


The walls are the same material, but we used a white wash on them and attached them in the same manner with silver truss head screws. Because of the slider door and our bathroom across from it, we did not need to stagger any pieces, as each board was able to run the entire length of the wall.
Plan out any outlets and cut with a circular saw or jigsaw before installing the pieces.
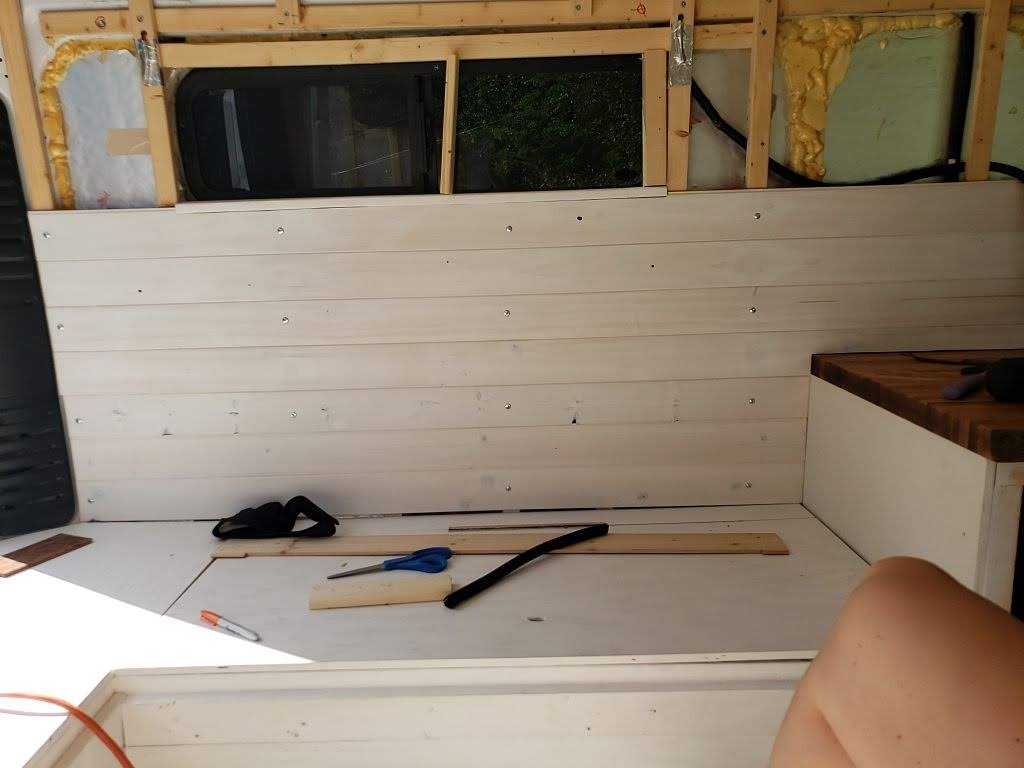
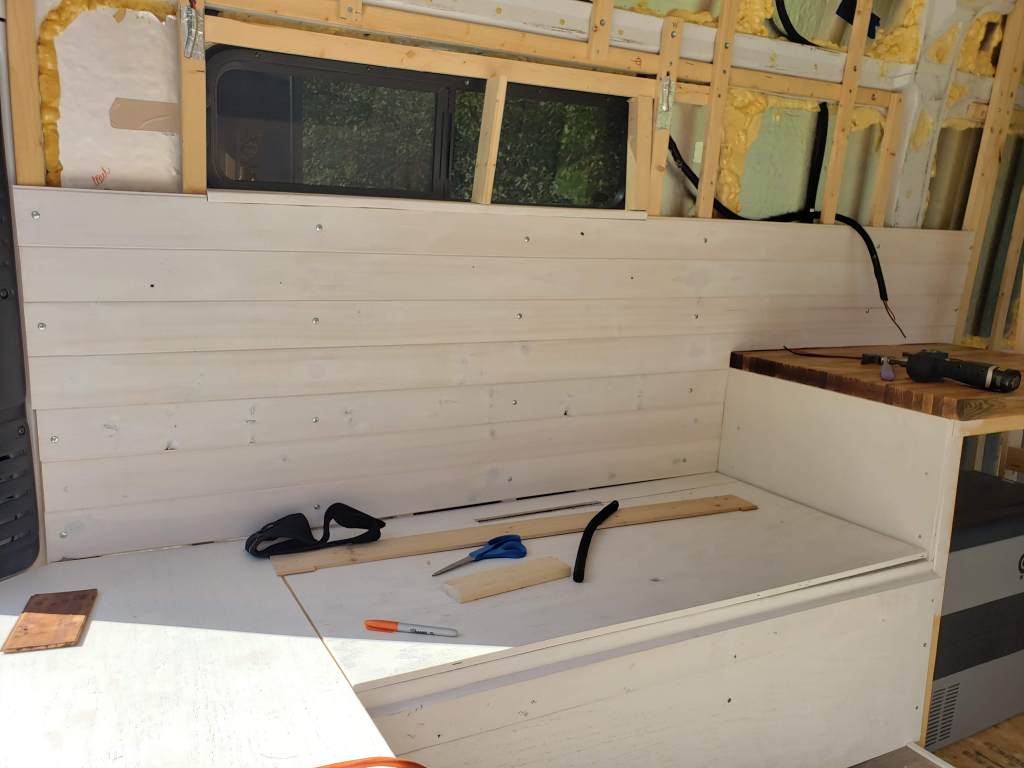
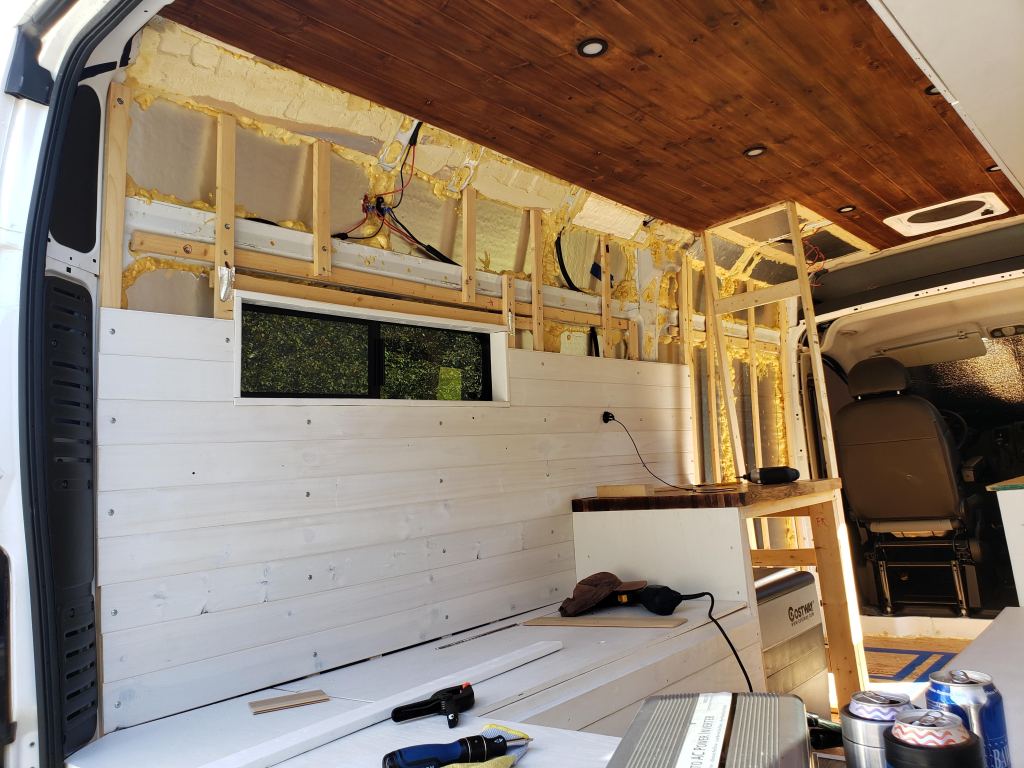


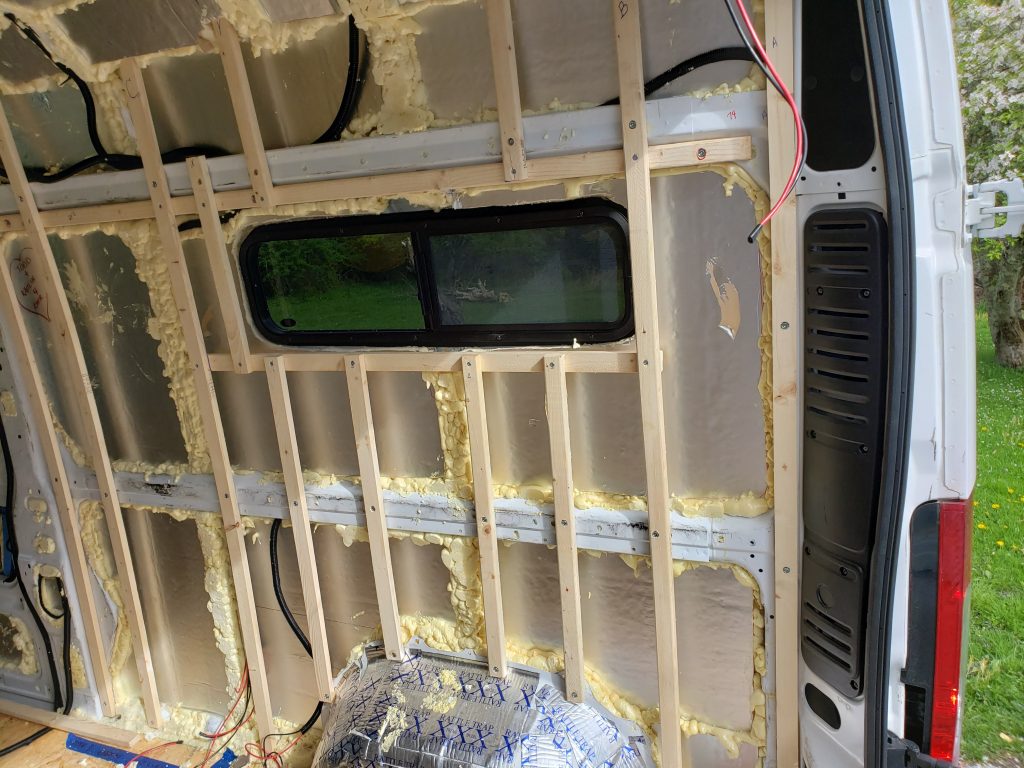
Frame out the windows with the 1″ x 3″ boards, fasten them to the furring strips and install the walls. We needed a jigsaw to cut out the boards around the window frame, but it wasn’t too difficult. Once the walls are in place, caulk around the windows any any seams in order to give it a nice finished look.
Install the outlets and light fixtures as needed and call it a day. As you may have noticed, this wall and ceiling happened alongside many other projects. Each piece of cabinetry determined where the wall was going to be installed in the final design. Take some time and plan it out, you will thank yourself later.

Pingback: Van Conversion: Building Simple, Custom Cabinets – Just Edith
Hey! Did you guys use furring strips for the ceiling? It looks like you just drilled the planks directly into the metal!
Thanks!
LikeLike