
After a couple of weeks of using the van to haul things around, we were finally able to get started with the conversion. The first step we took was to remove the bulkhead. This was pretty straight-forward, although it wasn’t exactly easy.
We are converting a 2017 Ram Promaster 159″ Wheelbase.
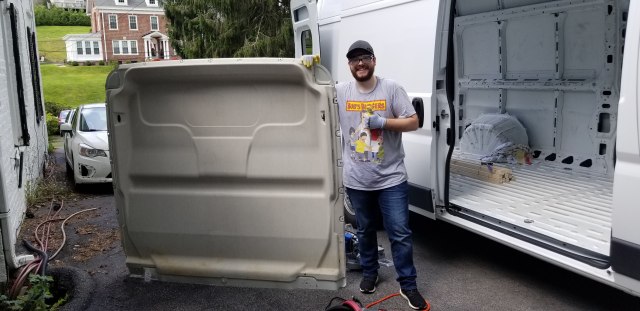
Removing the Promaster bulkhead
In order to remove a Promaster bulkhead, you need to undo some screws, some bolts, and drill through some rivets that secure the metal to the body. I referenced a CheapGeek video on youtube for most of this process.
He mentions using a T-40 Torx bit to remove the screws and the anchor bolts. I didn’t have one of those, but I was able to find that an allen key actually was able to get the job done. Done-ish. There was one anchor point that was stripped and stubborn. I tried everything. The allen wrench that was used to remove the first anchor bolt just spun in place, stripping it further (failure #1). So I decided that I would drill through the bolt, just like I did with the 2 rivets. I made very little progress with it that way. I watched videos about drilling bolts out that detailed drilling a pilot hole first, then using a bigger bit to get it out. When I tried that, the titanium drill bit broke off inside the bolt (failure #2). Sweet. Further attempts at drilling through were even harder because now it’s enforced with titanium… So I thought maybe I could drill the edges of the bolt in a few places, creating some points that would allow me to grip with with another tool and then turn the bolt(failure #3).
Ultimately, I cut through the bulkhead that was held in place by that bolt. Yup the bolt is still there and I’ve since used it as an anchor point without any problems. I think I’ll take an angle grinder to it. If it survives that, it will live in the van forever.
Drilling through the rivets took about 5-10 seconds each. I used a 5/16 inch titanium drill bit. Piece of cake compared to the steel bolt.
Building a floor frame in the van
After getting the bulkhead removed, we quickly got some 2″ x 2″ lumber cut and placed. It was exciting to see some progress. The reason I chose to do this was because I wanted some stability to be given to the flooring. I’m not very tall, so I decided I could sacrifice roughly an inch of floor space to give the floor some rigidity and allow for some good insulation to be installed in between the floor joists. Plus we watched Eamon & Bec do the same thing when they were building Bob’s van so it just seemed like a good idea.


Initially, we didn’t want to screw the pieces down if we could avoid it and hoped we could just adhere the boards to the body. Long story short, we couldn’t avoid it. So I used a spade bit to drill into the wood so the screws would be flush (and long enough to reach the body of the van). Then used #14 self-tapping screws to drill through the metal body and affix the frame in place. There were a couple of places we had problems during this process. Some of the places we were attempting to screw into would NOT go through. The best we could figure, we were trying to drill into a beam that was underneath the van which may have been a harder material. Then toward the back there was a spare tire mounted so we wanted to avoid putting screws around that. To account for that, we used metal brackets to affix the loose boards to boards that were screwed to the body and used Locktite PL premium as an adhesive to hold them in place as well.
Insulating the floor
After hours of researching insulation, we knew we couldn’t forgo insulation. Gnomad Home suggested using PolyIso rigid foam board for a few reasons.
- Roughly 6.0 r-value per inch
- Easy to work with
- Best cost for the r-value
Good enough reasoning for me. I bought 4 boards from Home Depot and we were able to get the floor covered with 2 boards. The remaining boards will go on the ceiling after we get some of the electrical wiring ran.
We cut the board to fit between the joists then sprayed some Great Stuff: Gaps & Cracks to adhere it in place and fill in any imperfections we had during the cutting process. Afterwards we covered the wood with reflectix tape to create a solid surface without any gaps for air.


Building the sub-floor
For the sub-floor, we decided we wanted a balance of something sturdy and cheap. I found OSB Sheathing at Lowe’s for about $12 for a 32ft2 sheet. I bought 4 panels to make sure we had enough for errors. We created some templates with cardboard and then transferred them to the OSB before cutting with a jigsaw. Before we get the last piece of sub-floor installed, we decided we wanted to copy some other van lifers and wrap the wheel wells in Rattle Trap. This is an adhesive rubber material that (hopefully) deadens some of the road noise.


Materials used
For those of you that like lists, here ya go.
- 2″ x 2″ x 8′ lumber (I think we used 9 or 10? we bought 18 so we can use some others for framing out cabinets or the bed)
- Great stuff Gaps & cracks for filling gaps and cracks, also for adhering some insulation to the floor
- 4′ x 8′ x 1″ GAF Energy Guard PolyIso foam board for insulating between the floor joists
- #14 1.5″ self-tapping screws. Probably 20-30 total.
- Locktite Premium
- Metal brackets – 2 straight, 6 L-brackets. We used these where we couldn’t screw the wood to the body. We avoided adding screws above the spare tire, just in case.
- Reflectix foil tape to cover the exposed wood and create a seal where the insulation met the wood.
- Fatmat Self-adhesive Rattle trap to surround the wheel wells and place in a few spots along the body to hopefully alleviate some road noise. We bought 25ft2.
- 7/16 OSB Sheathing cut to size to use as a sturdy sub-floor. We bought 4 boards to have a little bit extra.
August spending – itemized list
Feel free to comment if there is a better way of doing something 🙂 We are always open to learning from those who know more than us!

Pingback: Van Conversion: Framing plus Installing the Wall and Ceiling – Just Edith
Pingback: Vanlife Product Review and Recommendation: Propex HS2000 – Just Edith
Pingback: Van Conversion: Installing Vinyl Flooring – Just Edith