
We purchased a Nature’s Head composting toilet for our 2017 Ram Promaster 2500. Is it more than just expensive plastic?
I won’t make you read this very long to get my answer: Yes, the toilet is well engineered, but there are a few trade-offs.
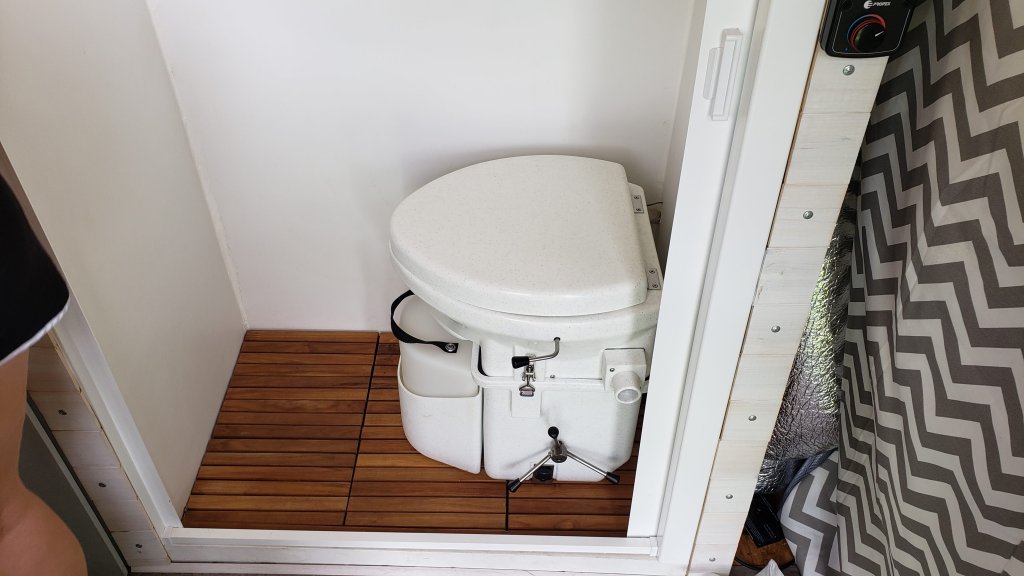
The Nature’s Head is a zero-water toilet that requires 12v DC power supply and a composting material. This is the real beauty of this product. It works by diverting liquids and solids, then storing until you can legally dispose of things. While the toilet needs to be emptied manually, it’s not that bad. Honest. The biggest selling point is the simple set up. No plumbing needed.
With that said, there were a few things that made this install a little bit tricky. Mainly, this may be a unique choice for a self-built camper. Because of that, there weren’t very many resources to figure out how to install the toilet properly. I found myself scrambling trying to figure out how to vent this thing without allowing water to find it’s way into the vent hose when it rained.

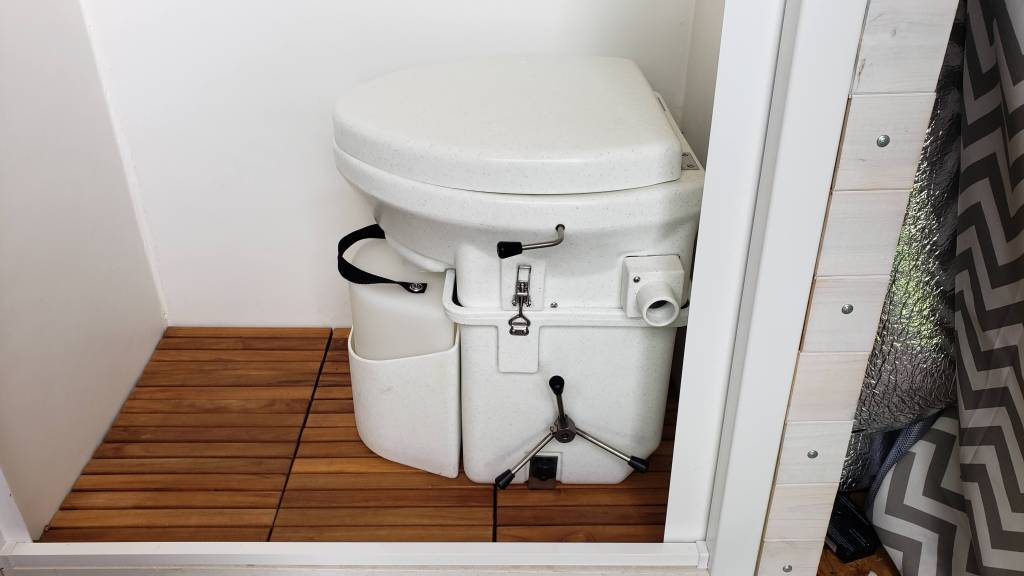
Even worse, we had not realized we needed some extra space in the bathroom in order to run the vent hose. We built our bathroom with the dimensions listed to mount the toilet. However, the wall was blocking access to the vent port. Some creative thinking was needed for this. I’ll discuss this in more detail later, but the photos above show the basic idea.
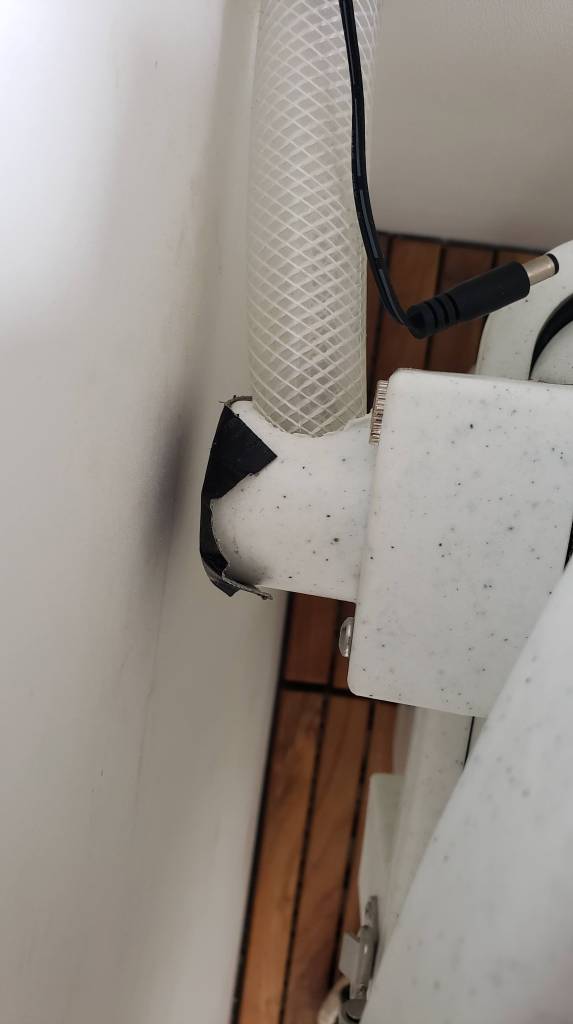
Once the vent tubing had been ran outside, I sealed it in place with some silicon. Additionally, we cut some pest-resistant bug screen and clamped it over the end of the vent tube.
Now all the smells created from the toilet are vented directly outside and we have never had any insect problems in the van. After a couple rotations of the tank, the smell dissipates rather quickly. No one who has ever mentioned a smell and we have asked.
My only other pet-peeve would be the height of the toilet. The taller it is, the bigger the tank, the less frequently it needs to be emptied. The trade-off is feeling kind of “perched”. This could be solved with a small stool (get it?), but space is also limited in a van. I’m not a tall person, but I wouldn’t call myself short. Tall people don’t live in vans, so I’m not sure who feels comfortable on a Nature’s Head toilet.
Caring for the Nature’s Head Toilet
The most frequent questions about the toilet are usually surrounding the disposal routine. We don’t need to be near a dumping station in order to empty the toilet.

Thumb screw 
Latch 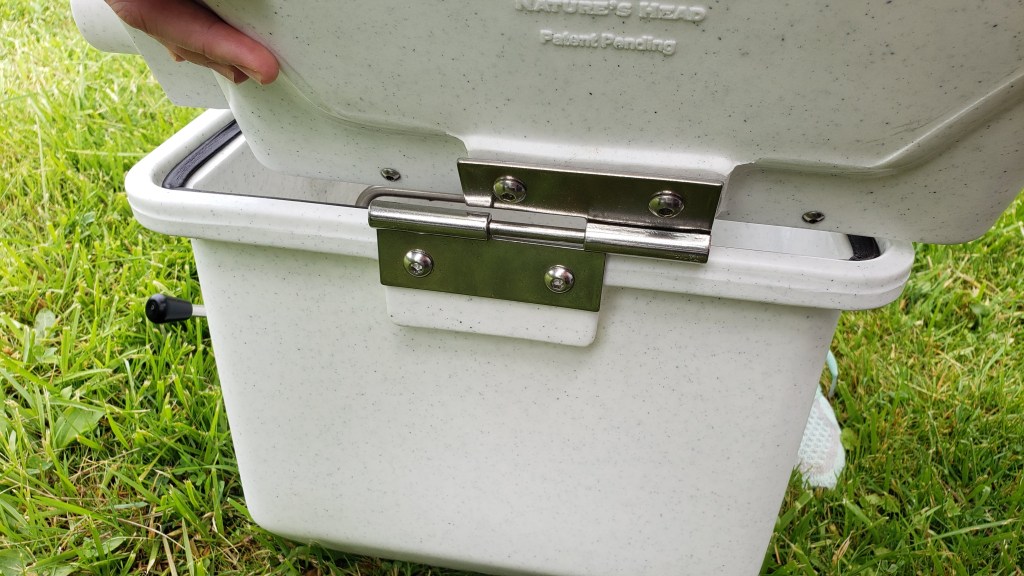
Sliding hinge
Dealing with liquid waste is easy, but also the smelliest portion of it. One tip we have learned is to ‘flush’. Dilute some white vinegar in a spray bottle, then just follow bathroom time with a couple of sprays. Once the liquid tank is nearing full, flip the latches on both sides of the toilet. Lift the head of the toilet and pull the tank out. Once the liquid waste is disposed of, it’s important to follow it with another rinse. Use some water, soap or vinegar and slosh it around and dump again. Put the tank back in place and fasten the hinges and it’s good to go on liquids for a few days.
Solids take a bit more work, but the process isn’t exactly difficult. Start by unscrewing the toilet from the floor via the thumbscrews. Disconnect the vent hose and power connection and take the toilet outside for the next part. Unfasten the latches again, tilt the head and slide it off the main rear hinge. Dump the solid waste, then fill the tank with some more of the composting material and secure everything back in place.
Recommended Purchase

Even with my complaints, I will still advise people to account for this in the budget. Not having to run plumbing will save you a fair amount of time. There’s also no need to have a black tank with a Nature’s head toilet. If you don’t have to purchase or install a black tank, the price makes a lot more sense.
Kaitlin and I have used the toilet on numerous trips and have only changed the solid waste container once. By having the power supplied to the toilet constantly, the fan is always pulling air through the base and venting directly outside. The compost material aides in drying everything and really prevents the smell from escaping. Even when emptying the toilet, it just smells earthy.
If you found this review helpful, please consider purchasing the Nature’s Head through our affiliate link!
Additional tools and materials for installing Nature’s Head Toilet in an unusually small space
I spent a while scouring the internet to find a solution that didn’t involve rebuilding our bathroom to larger dimensions. There was no information to help me with this, so this post was written with that in mind.
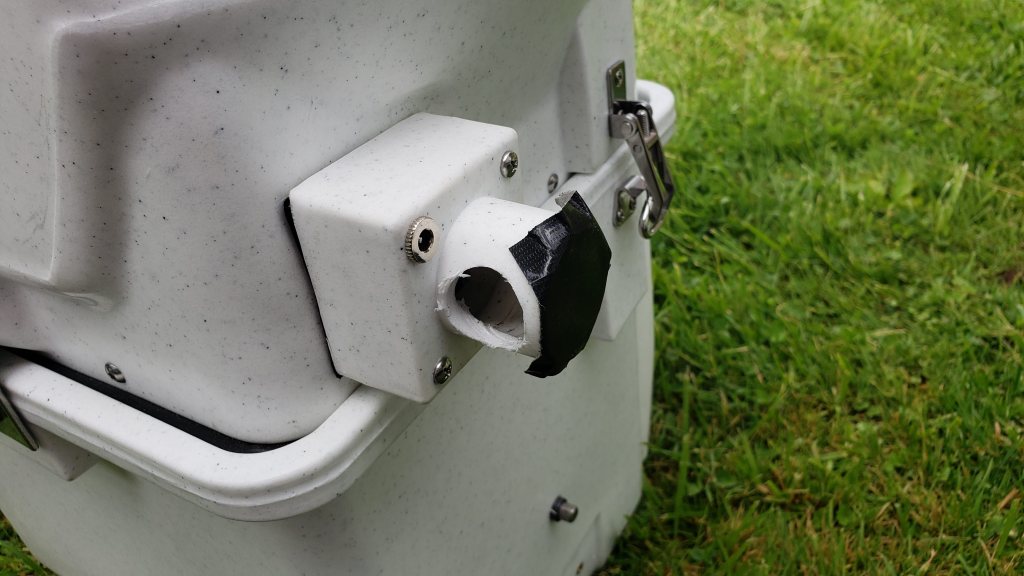
In order to complete the creative solution mentioned above, we needed a couple of things that were not included with the toilet. If you are better at planning than us, you will not need these items. We had so little leeway, a 90 degree PVC elbow would not even fit on the vent. It was frustrating, but if you find yourself needing to save some additional space, here’s what you need.

Some 3/4″ vinyl tubing was necessary in order to fit into the side of the vent. This created a 90 degree angle, allowing us to fit the Nature’s Head into a much smaller space.
The beauty of this is that it can also be used for a shower, filling up your tanks, and we have also incorporated it into the plumbing for the kitchen sink. It’s reasonably priced and has many uses. Win win. Don’t forget to pick up a knife or some sort of specialty cutting tool. I used a pex cutter and it worked beautifully. If you are going to be using pex anywhere in your build, go ahead and buy this tool.

Once you have the tubing, you can match the outer dimension of that tubing with a hole saw. I’ve recommended a hole saw kit, mostly because I needed to buy several different sizes throughout the build, and eventually did buy a kit. Though technically for this step, it’s possible to get by with a single hole saw of the specific dimension that matches the tubing.
Cut the hole on the side of the vent in the direction you will be running the vinyl tubing. It is a flexible material over a distance, but short distances can make it fairly stiff; take your time and line things up.
Cut any additional holes on your way out of the van with the same hole saw. Once you run the tubing to it’s final destination, seal all the cuts with some caulk.

Finally, cut some pest resistant screen to size and secure it over the end of your new vent with a stainless steel hose clamp. Voila! The Nature’s Head toilet can now vent properly with a tiny amount of space required. Connect the power and test everything out.
